
SCARA Robotic Arm

For the past year or so, I have been working on a SCARA robotic arm with the goal of replicating the mechanics and kinematics of commercial SCARA arms as closely as possible. This has been by far the most challenging project I have undertaken. This post provides an overview of the project, showing the design process from start to finish.
What's a SCARA arm?
SCARA (Selective Compliance Assembly Robot Arm) arms are traditionally used for pick-and-place operations. They have several advantages over traditional Cartesian arms, as they can generally be faster and maneuver into hard-to-reach areas.
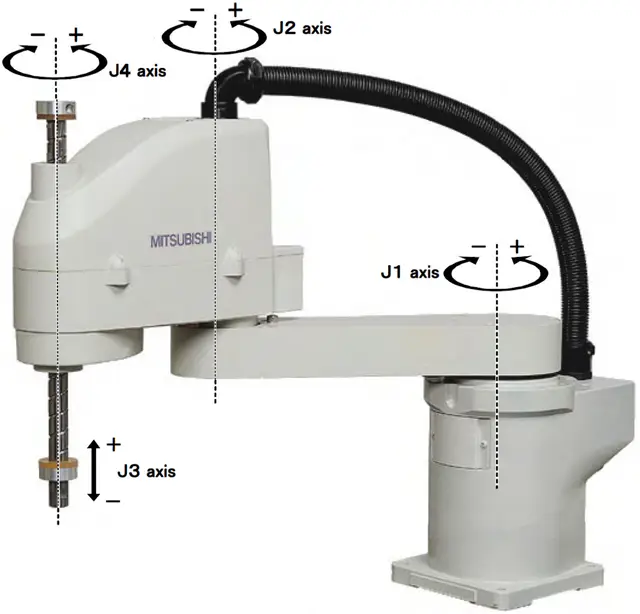
One aspect traditionally found on commercial SCARA arms is a ball spline screw. The ball spline screw allows the arm to have vertical Z movement and rotation around the same axis.

This was the main feature that drew me to the SCARA arm, as I thought the ball spline screw mechanism was extremely cool. I soon found out that SCARA arms seem to be the primary application for ball spline screws, so the ones available online are often made for specific SCARA models. They are generally extremely expensive due to low demand and being hard-to-manufacture parts. Every DIY SCARA arm design I found online instead places the Z-axis at the base of the robot, which was a compromise I did not want to make.
After a few weeks of setting up some eBay alerts, I found a listing from someone selling a ball spline screw that they supposedly found at a garage sale. $80 later, I had this part that came with no documentation or CAD models.


Photo of the ball spline screw along with the CAD model I made of it
Project Requirements
Now that I had a part to design a robot around, I created some design requirements for the project:
- Prioritize precision and repeatability over speed
- Machined arm components to improve rigidity and strength
- End effector needs to be able to rotate continuously
- All power and electronics contained within the main body
- Try to make the mechanical/aesthetic design similar to commercially available SCARA robots
The Mechanical Design
Motors and Gearboxes
The motors and gearboxes were by far the hardest part of this project for me. I chose to use two NEMA 23 closed-loop stepper motors for the two main arms and two NEMA 17 closed-loop stepper motors for the Z-axis and rotation.
Given that each arm of the SCARA is 180mm, any backlash in the joints will grow quite significantly over the length of the arm. So, when it came to choosing a reducer for the motors, minimizing backlash was the main priority.
Against my better judgment, I initially chose to try direct drive, as that would have no backlash at all, but it proved to have far too little torque to successfully do anything.
When creating a reducer, I originally chose to try to make a 3D-printed harmonic drive.


Render and image of harmonic drive prototype
After several revisions, I arrived at the design above, but unfortunately, in all the testing I did, I could not get the backlash below 2-3 degrees. I think that when making a harmonic gearbox this small and from plastic, the teeth are just not strong enough to counteract the torque from the arm.
After this failure, I moved on to designing a cycloidal drive, which is something I had a bit of experience with from a past cycloidal gearbox project. After probably a dozen revisions, this was the design I landed on.


Render and image of cycloidal drive prototype
During initial testing, this seemed promising, as I couldn't feel any backlash whatsoever. Unfortunately, after stress testing the gearbox, the outer pins started to deform the cycloid, which introduced around 2-3 degrees of backlash. If I had been able to machine the cycloids, this design might have worked.
The Belt Drive Gearbox
After some frustration figuring out the gearbox situation, I chose to try to make a belt drive gearbox. This design combines two 3:1 belt reductions for an overall 9:1 reduction. The gearbox uses jack screws to tension the belts and keep the backlash to a minimum.


Renders of belt drive gearbox
Here is a short video of an initial test I did of this gearbox.
When testing this on the robotic arm, I measured ~25-30 arcminutes of backlash. While not perfect, compared to my other designs and considering the compact form factor, I was really impressed by the results. For reference, this planetary gearbox advertises 30 arcminutes of backlash but is 71.5 mm tall, while my gearbox is only 22 mm tall.
One downside is that because the parts are plastic and use jack screws for tensioning, material creep over time can cause the backlash to increase, even when the robot is sitting idle. Through my testing, I found that this does not seem to have much of an effect yet, but if it does down the line, the jack screws are easily accessible to re-tension the belts.
Elbow Motor Reduction
For the reduction of the elbow motor, I chose to integrate a belt reduction over the length of the shoulder linkage, giving that joint a 6:1 reduction.

This belt is tensioned simply by tightening the motor down inside its slotted mounting holes while holding the belt under tension.

Z and Rotation Motors
The Z and rotation motors also use the same slot tensioning technique, using belts with a 3:1 reduction to interface with both ends of the ball spline screw.

Servo Gripper
For the end effector of the arm, I chose to design a simple four-bar linkage gripper using helical gears.


Renders of servo gripper
One difficult aspect of this was providing power and communication through a shaft that could theoretically spin indefinitely.
The obvious answer is to use a slip ring, but I struggled to find one that could handle the current and have a small enough form factor to fit. I solved this by using a magnetic concentric 4-pin connector that uses pogo pins to make electrical contact.


Output wiring to gripper (left), 4 pin magnetic connector (right)
In the right photo, you can also just barely see the Hall effect sensor that is used to home the Z and rotation axes.
The Final Mechanical Design
Putting all of this together, this is the final design of the arm that you can see in the draggable view below.
Software
For the software side of things, I decided to base the arm on the Arduino Uno R4 Wifi because it has a 32-bit chip and 5V I/O, which is needed for the stepper motors (and I didn't want to bother with level shifters).

The software for the arm is split between a controller app that handles all the inverse kinematics and interpolation, and the low-level firmware that takes the calculated waypoints from the control software and executes them.
Inverse Kinematics
A core part of robotics is inverse kinematics. If I have an $(x,y)$ coordinate I want the arm to travel to, I can use the equations below to find the angles the motors need to be at to reach that point.

$$\theta_1 = \arccos\left(\frac{x^2 + y^2 - L_1^2 - L_2^2}{2L_1L_2}\right)$$
$$\theta_2 = -\theta_1$$
$$ \phi_1 = \text{atan2} \begin{pmatrix} L_2S_2x + (L_1 + L_2C_2)y \\ (L_1 + L_2C_2)x - L_2S_2y \end{pmatrix} $$
$$\phi_2 = -\phi_1 + 2\text{atan2}(x,y)$$
$$S_2 = \sqrt{1-C_2^2}$$
$$C_2 = \frac{x^2 + y^2 - L_1^2 - L_2^2}{2L_1L_2}$$
The $\theta_1$ and $\phi_1$ would be the values for the "left hand" solution and $\theta_2$ and $\phi_2$ would be used for the "right hand" solution. I chose to write my code so that if both right and left hand solutions are valid, it chooses the pair of angles that have the least angular distance to the next waypoint.
Control Software
To be perfectly honest, the control software got a bit carried away, and I probably should have used something like MoveIt with ROS2 instead of doing everything from scratch. However, for the most part, I enjoyed the process and feel like I learned a lot more doing it this way.
Here is a screenshot and video of the control software.

Firmware
I won't delve too in-depth on the firmware because, to be honest, it's hard to visualize and kind of boring. I chose to use the AccelStepper/MultiStepper library to control the steppers, which ironically doesn't support acceleration when commanding multiple motors to reach a target simultaneously.
I created my own replacement for the MultiStepper library. With it, I can command the robot to move to a waypoint, and it will vary the velocities of all motors so they reach the intended target simultaneously, including acceleration. This lessens the change in momentum when moving from point to point, allowing the robot to reach higher speeds.
If anyone is interested in looking through the code for the control software or the firmware, it's available on my GitHub.

Manufacturing
While most of the arm consists of 3D-printed parts, the four aluminum plates that make up the arm required a bit more work.
To save cost, I decided on waterjetting the plates out of some aluminum plate stock that I had and then face-milling them to their final thickness.

It might be hard to tell in the image, but when cutting these parts, the waterjet service at Iowa State messed up some of the settings, leading to some extremely rough and jagged edges, as well as one location where a hole was cut in the completely wrong place (seen in the bottom right).
When it came to post-machining, I face-milled both sides down to final dimension. Here you can more clearly see the jagged edges from the waterjet.

One thing to note is that using the waterjet to cut the 2D profile of these plates was indeed a lot cheaper and faster, but if I were to do this again, I would have CNC machined the plates entirely to guarantee the positional accuracy of all the holes. A large problem I had with this project was not having a true datum to reference on these parts for a robot requiring this level of precision.
Once all the arm plates were done, I was able to do a quick test fit with the crossed-roller bearings I purchased to support the large moment load of the arm. One thing to note is that I assembled this before deciding to move the elbow motor to the base and use the belt reduction I discussed earlier.


Photo of the crossed roller bearings and the test fit of all the machined components.
The base plate was made after all the other parts, but as it didn't have any extremely critical dimensions, I decided to also waterjet it. Luckily, this time, I was able to talk with the technicians and better tune the waterjet settings for the material, so it came out great.

Motor Coupling
I wanted the coupling from the motor to the crossed-roller bearings I was using to fit accurately and not wear or bend under the torque of the arm. As luck would have it, right when I was getting around to designing a solution for this, PCBWay emailed me and said that they would love to support the project.
I took them up on the offer, designed a CNC-machined coupler, and sent it over to them to manufacture. Two weeks later, the shaft coupler arrived.


Photos of the motor coupling and the installation
The part came out perfectly, with every critical dimension I specified well within tolerance. From this experience, I can already start thinking about using their services for manufacturing things I cannot make myself, such as metal 3D printing or more CNC-machined parts. Full disclosure: PCBWay did send the parts over but is not paying or requiring me to promote their service. That said, if you're interested in making some cool parts, I would definitely recommend their services.

3D Printed Parts
This project really put my 3D printer to work. Nearly every 3D-printed part on the robot went through countless revisions to reach the final design. This project has definitely set a new personal record for the number of failed attempts and revisions needed. Here is an image of all the failed prints I accumulated over the past year.

Assembly and Testing
Here are some pictures of the final assembled robot.


Closeups and internals of various parts of the arm
Testing and Demo
The first test I wanted to run was simple: moving around some screw organizer bins I had laying around to test the positional accuracy of the robot. Here is a timelapse of a 30-minute test I ran, with the robot continuously moving these bins around without losing its position.
30x Speed Positional Accuracy Test
Here is a demo I did of the arm moving around a Wiimote and a small anvil.
SCARA Arm Demo
Future Improvements
There are still some areas where I think this project could be improved. Firstly, the amount of work I put into making the gearboxes for this project led me to a design with incredibly low backlash for how compact it is, especially considering it's fully 3D-printed.
However, the kinematics of a SCARA arm are quite unforgiving regarding how little backlash is acceptable. If this project's budget were higher, I would have liked to use off-the-shelf harmonic gearboxes or all-in-one harmonic servo actuators.
Given that these are incredibly expensive, they were outside the budget for this project. But, if there is anyone reading this who makes robotic actuators or servos, I'd always be open to working together.
Conclusion
As much as this project has been the bane of my existence for the past couple of years, I really enjoyed working on it and learned a ton. I have never done a large project that incorporated so many different skills. I learned many new things through this project: new CAD techniques, machining the aluminum parts, robot design and kinematics, and programming an entire control application and firmware.
I am quite impressed with the end result, too. I think I accomplished most of the goals that I set, and I still can't get over seeing a robot arm move around, knowing I made it from scratch.
Thanks for reading! Leave a comment or check out some of my other posts below.
Caden Kraft Newsletter
Join the newsletter to receive the latest updates in your inbox.


